Drain Cleaning
Plumbing

Drain Cleaning: How to Get Rid of Clogged Drains

Drain Cleaning Tampa is the process of removing all of the grime buildup from a drain. Clogs can be caused by a variety of factors and can result in bad odors, slow drainage, and other issues.Drain Cleaning

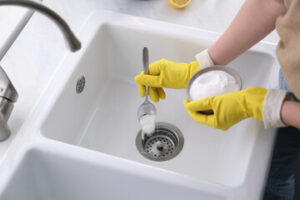
Often times, homeowners turn to chemical drain cleaners to resolve their clogs. These chemicals can be extremely damaging to pipes and plumbing systems.

Salt is a common household item that has numerous uses, including being an effective drain cleaning ingredient. When combined with hot water, it creates a powerful flushing agent that can scrape residue and dissolve clogs. It can also be used in combination with other drain cleaners to help deal with more stubborn or persistent clogs. To use salt and hot water as a drain unblocker, make a 50/50 solution of hot water and salt, then pour it down the blocked drain. Repeat as necessary to clear the clog. Be sure to keep the water temperature below boiling, especially if your home has metal pipes, as high temperatures can soften or melt them. Also, be careful not to scald yourself when pouring the hot water down the drain, as this can cause serious burns.

It makes sense in theory that pouring a coarse substance like salt down your drains would help break up whatever is causing it to clog and that the chemical makeup of the salt itself would somehow interact with the clog and cause it to disintegrate. However, this is not actually what happens when you pour salt down your drains, at least not on its own.

Instead, salt is best used as a component of drain cleaners, along with other ingredients like baking soda and vinegar. This is particularly helpful if you have a grease-based clog in your kitchen drain, as this combination will disintegrate and remove the greasy buildup from your pipes.

To use this mixture, pour a cup of salt and a cup of baking soda down your drain at night, then follow it with a pint and a half of boiling water the following morning. You can also combine these ingredients with liquid grease-fighting dish soap to get an even more powerful drain cleaning mixture that will clear nearly anything from your pipes.

While you can use this on a regular basis to clean your drains, be sure to use it sparingly and in conjunction with other drain cleaning ingredients, as it is not very good for your pipes or the environment if used too frequently. Also, be careful when using this method if you have plastic pipes, as the extremely hot water can melt or degrade them over time.

Plunger

A clogged drain can be a major nuisance, but a plunger is one of the most inexpensive and convenient ways to solve it. This simple plumbing tool can be found in almost every household and is easy to use. It can even clear clogs in toilets! However, it is important to know how to use your plunger properly in order to get the best results.

First, make sure the plunger cup is completely immersed in water. This will create a seal around the drain opening, keeping air from getting into your pipes. Next, push down on the handle—gently at first—forcing the air out. Then begin plunging with quick, deliberate thrusts, directing the pressure down the drain without lifting the handle high enough to break the seal. Continue this action for approximately 20 seconds. After this, pull the plunger away, and the clog should be cleared.

If plunging doesn’t work, you may need to try a more aggressive drain-clearing solution. Liquid drain cleaners are harsh chemicals that can cause burns to the skin and eyes, and they can also be dangerous to the environment if they spill or splash. If you decide to use liquid drain cleaner, it is recommended that you wear protective gloves and goggles to avoid splashing.

Another option is to use baking soda and vinegar. Mix equal portions of these ingredients and pour them down the drain, then wait 15 minutes before rinsing with hot water. You can also try a dish soap and hot water solution by placing a few tablespoons of dish soap in your drain, followed by hot water.

Finally, you can try using a plumber’s snake. These plastic-coated, wire-like devices are narrow and flexible with a series of barbs. They are designed to fit into a sink pop-up assembly and are fed down the drain pipe while cranking the handle. While a plumber’s snake is more expensive than a drain plunger, it can be effective if the other methods don’t work.

Baking soda and vinegar

Baking soda and vinegar work as natural drain cleaners that can help dislodge and break down food particles, hair, soap scum, grease, oil, and other organic material that can clog your drain. This household product is also effective at killing germs and odor-causing bacteria in your drains and pipes. Plus, it’s an affordable option that you probably already have in your kitchen pantry.

The chemical reaction that happens when these two household products are combined creates carbon dioxide bubbles that help loosen greasy, fatty materials blocking portions of the pipe. This bubbling action works in a similar way as some commercial foaming drain cleaners, but without the toxic chemicals.

To use this home remedy, pour a cup of baking soda down the drain, followed by a cup of white vinegar. Wait a few minutes and watch for the audible fizzing reaction as the ingredients neutralize one another. Once the fizzing stops, flush the drain with a pot of boiling water. This hot water will soften any fatty buildup and allow the baking soda and vinegar to clear away stubborn clogs.

While this method is effective at cleaning and disinfecting your sink, it is not as strong as a professional drain snake or homemade plumbing snake and should only be used to dislodge relatively small clogs. If the clog is serious or if it doesn’t disappear with this solution, try using the professional drain cleaning services of Pristine Plumbing to remove it.

It’s important to note that this method will corrode the metal of your drain and can cause damage to the pipes if overused. It’s recommended that you use this method no more than once a month to keep your drain clean and healthy. If you notice any rust spots on your drain after using this method, be sure to clean it immediately with water and a steel wool pad. This will prevent a more severe and costly corrosion problem down the road. For more information about drain cleaning and other plumbing services, contact a professional at Pristine Plumbing. We serve Orange County and can help with all of your plumbing needs.

Plumber’s Snake

When a drain clog can’t be removed by cleaning the trap or plunging, you may need to use a plumber’s snake. Also known as a drain auger, this is a long, flexible metal cable with a cone-shaped tip that works to break up and remove drain blockages. It is similar to a drill bit, but it is designed for pipes and can be fitted with various blade sizes and lengths to handle different types of materials.

Before using the snake, it is a good idea to protect yourself and your work area with gloves and a bucket to collect any debris that might fall out of the pipe. Also, consider loosening the screw that holds the cable to its housing, allowing you to pull it out and back in as needed. This will prevent the snake from becoming stuck inside the drain and allow you to continue working on the clog.

Depending on where the clog is, it may be necessary to disassemble the P-trap (the U-shaped section of pipe under your sink) or remove the vent stack. If this is the case, you will need to prepare the area by putting down old towels and wearing rubber gloves to protect yourself from any splashes or debris that might be produced.

After using a drain snake, it is a good idea to rinse it out with clean water before pushing it back into the drum. This will help prevent water from pooling and causing the cable to rust, which can shorten its lifespan. It is also recommended to wrap the cable in a rag to prevent it from catching on anything else while it is being pulled out of the drain.

Both a plumbing snake and a drain auger are effective tools for removing most common household clogs, such as food scraps, hair, soap scum, and paper products. However, if your clog is more severe or caused by something that may be harder to remove, it might be time to call in a professional. Avoid trying to resolve a difficult drain clog on your own to avoid further damage to your pipes and potential health hazards for yourself and your family.

Fireplace Repair
Chimney

Why Fireplace Repair Is Important

A fireplace is a cozy place to sit on a cold evening with family and share stories. But when your fireplace isn’t working properly, it can destroy those moments.Fireplace Repair

Look for signs of damage like a crack in your safety glass screen, which could allow dangerous chemicals to leak into your home. Other issues include gas smells and a lack of flames. If you need some professional help, you may contact Fireplace Repair West Chester PA.

Rust is a common problem in fireplaces, especially in older systems. Metal chimney components like the cap and chase cover, as well as the flue liner, are prone to corrosion due to their exposure to moisture over long periods of time. The rust can eventually cause structural damage and lead to leaks. If you see rust on the chase cover or firebox, it is important to call a professional to have the system inspected right away.

The first step is to clean the rust off the fire pit. Using gloves and protective coverings, vacuum or sweep the area to remove large particles. Next, use a wire brush or Scotchbrite pad to loosen the rust from the surface. After this, you can scrub the rust off with steel wool. Make sure you rinse the surface thoroughly after you are done to prevent further damage. You can also use a paste made from baking soda and water to slowly loosen the rust before you scrub it off. After you have removed the rust, use a rust remover to keep it from returning.

If you have a cast iron fireplace insert, you will need to consult a certified welder to restore the unit to its original appearance. This will require gradually heating the cast iron to high temperatures and then cooling it down before welding any cracks. This will take several hours and may cause odors and smoke detectors to go off.

If you notice that your fireplace is not lighting or the flames are erratic, it is likely a problem with the burner orifice, which is the opening in the tubes that send gas to the combustion chamber. This could be caused by a buildup of creosote or other deposits. You should contact a professional chimney technician to check the orifice for problems and repair it as needed.

Soot

There is no denying that fireplaces produce soot, and if it isn’t cleaned regularly, it can build up and leave lasting stains on the surrounding brick. Soot isn’t just unsightly, though; it can be dangerous to home occupants as well. Soot is made up of carbon particles that aren’t fully combusted, which means that when inhaled, these particles can affect your health. They can cause a variety of breathing problems, including bronchitis and asthma, and even increase your risk of certain cancers.

Soot buildup in gas fireplaces may be caused by several things. First, misaligned fire logs can block the flame path and result in an incomplete burn that produces soot. Secondly, soot can accumulate on gas burner ports when they are clogged with residue from improper burning. Soot may also be produced if the gas regulator feeding your fireplace isn’t adjusted correctly. Having an HVAC expert check your fireplace for these issues can help you avoid soot buildup in the future.

To remove soot, start by saturating the area with water. This will prevent the cleaning solution from drying out as you work on it. Next, use a vacuum to remove the majority of the soot. You can then soak the ceramic logs in a mixture of vinegar and lukewarm water. You should dry the logs afterwards to keep them from cracking or warping.

Finally, you can wipe down the remaining soot with a cloth or cotton swab and a cleaner such as borax or ammonia, as long as it is permitted in your fireplace’s manual. Make sure to follow all of the instructions for your cleaner thoroughly to avoid voiding any warranties or damaging your fireplace.

Shaling

A gas fireplace with a working pilot light is one of the most enjoyable ways to warm up on a cold night. The kids can sit around the fire and tell stories while you enjoy a cup of hot cocoa. So, if you go to start the fireplace on a cool evening only to find it will not turn on, this could be an indication that the system has a problem. The problem could be as simple as flipping the wall switch on and off or as complicated as a clogged flame sensor, a blocked gas valve, a broken thermopile, or faulty wiring. A technician will be able to determine the cause and fix it.

If you find that your chimney and fireplace have become unsafe or don’t work correctly, this may be a sign of serious damage and neglect. Our SuperTech technicians can provide you with a thorough inspection and bring your chimney up to code.

Despite your best efforts to keep it clean, creosote can sometimes build up in the damper hinge of your fireplace. This problem can be solved by thoroughly cleaning the damper and lubricating it with a rust-preventative, penetrating oil such as WD-40.

Another sign that your fireplace is not working properly is a strong, pungent odor of natural gas, which can be dangerous. If you notice these odors, call your utility company immediately and have a professional examine the system. They may also recommend the installation of a new flue liner.

Broken Flue Tiles

Most masonry chimneys were built with clay flue tiles, and over time, these can crack and become damaged. This is a problem that should be repaired by a professional chimney sweep as soon as it is detected. Cracks, gaps, and spalling can allow gases and chemicals like carbon monoxide to seep into your home. These harmful gases are not only dangerous to your family but can also deteriorate the brick and mortar of your chimney over time. It is also a fire hazard, as the cracks can allow creosote to enter the chimney. Creosote is highly flammable and can damage your roof as well as your chimney.

Chimneys should be inspected every fall to ensure that they are free of cracks and gaps in the flue tile liner. This should be done with a flashlight and safety glasses to ensure that all areas are being checked. If you have cracks or gaps in your flue tiles, it is a good idea to have your chimney relined before the heating season begins.

There are several ways to repair cracked flue tiles. If the tile can be accessed easily with a hammer, it can be broken apart and replaced with a new one using cement to hold it in place. If there are many cracks and gaps, it may be necessary to have your entire chimney relined with a stainless steel liner. This system is dropped down the chimney to cover the old clay tiles, and since it is one piece, it will not crack as easily as the existing tiles. It is also less expensive than a full chimney teardown.

Burner Orifice

The burner orifice is a brass fitting with an appropriately-sized hole for the flow of natural gas or propane. It controls the size and intensity of the flame in a fireplace, as well as the gas flow to other parts of the stove or fireplace itself. It also determines the overall Venturi effect of the fire.

When the orifice is clogged, it won’t deliver enough fuel to the burner tube for proper combustion. It is important to check and clean the orifice regularly, as it can easily be blocked by dirt.

An orifice that is too large can also cause problems. This is because the cone of gas that exits the orifice won’t match the shape of the burner flare, and it will create too much of a vacuum to pull in sufficient air.

If the orifice is too small, it will have the opposite problem. The cone of gas will have trouble matching the shape of the burner flare, and it won’t be able to create a strong enough vacuum to pull in adequate air for combustion.

It is important to know that the relationship between pressure and orifice size is a quadratic equation, not a linear one. Double the area of the orifice, and you will quadruple the BTU potential.

The orifice size must be correct for the type of gas being used, so it’s important to consult a burner orifice chart to ensure the orifice is correctly sized. Propane orifices are smaller than natural gas orifices. Use the chart to find the size that will fit your fireplace, and remember to replace the orifice when you change your gas source. Our glassblower friend had to do this after he switched from natural gas to propane.

spray insulation
Insulation

What Is Spray Insulation?

Spray Insulation is a type of foam insulation that consists of two or more chemicals that are mixed together in a spray gun. Once mixed, the foam is applied to the building using two or three passes. The first pass is usually no more than 1/2 inch thick, and the second and third passes can be up to 3 inches thick. After the first pass, the foam must be allowed to cool. The cooling time is about 10 to 15 minutes per inch of foam thickness, and a maximum of 30 to 45 minutes for a three-inch thick layer. spray insulation

Open-cell spray foam is a type of building insulation. This type of foam is made from two different chemical components that are kept separate. They mix when pumped through a heated hose to create a solid-like material. These types of insulation have a variable R-Value but can provide excellent insulation for most buildings.

While closed-cell foam is stronger than open-cell foam, it requires more chemical material per volume. As a result, it is more expensive to purchase and install. Open-cell foam has fewer overall advantages, but is a superior sound-deadening material and is stronger than cellulose or fiberglass. However, it is not ideal for homes with drafty areas. Open-cell spray foam is more commonly used in colder climates and is more energy efficient than closed-cell foam.

Open-cell spray foam insulation is softer and more flexible than closed-cell spray foam. The difference between open-cell and closed-cell spray foam insulation is the number of tiny bubbles in each piece. Open-cell foam has smaller bubbles that are partially ruptured, while closed-cell foam contains larger, closed pockets that enhance the rigidity of the material.

There are many advantages to open-cell foam insulation, but they also have their disadvantages. You should consider the benefits and drawbacks of each type before you decide which type to use. Open-cell foam is a better option for some applications, and closed-cell foam is best for other applications.

Self-adhesive spray insulation is an excellent choice for a variety of home insulation projects. This type of spray is available in a variety of sizes and types and has a bonding time of one to 30 minutes. It is also suitable for landscaping and roofing.

Self-adhesive insulation tapes are typically available in two-inch-wide rolls and are suitable for most pipe diameters. They should be applied to the inside surface of the pipe or tube and may be butted or overlapped. It is important to apply the tape while the material is dry and above 40 degrees F.

A quality self-adhesive is non-flammable and non-wrinkling. It is also highly resistant to temperature and water. Self-adhesive spray insulation is a high-quality construction adhesive. Whether it is used in a home or office building, it will ensure a strong, long-lasting bond.

AlbaChem Super 88 is a versatile, industrial-grade adhesive that tacks up fast and will not wrinkle on even the roughest surfaces. It bonds a variety of materials, including plastics and foils. It is suitable for applying insulation and corner patch assemblies and is water resistant.

When you have spray insulation installed, it’s important to know the health risks associated with this process. One of the main concerns is the chemical content of spray foam. It contains methylene diphenyl diisocyanate (MDI), which contains benzene, chlorine compounds, and formaldehyde. These compounds are known carcinogens and bioaccumulative toxicants.

In addition to creating hazardous fumes, spray foam insulation is also dangerous to the environment. Though the chemicals are considered inert after drying, their residual effects can cause respiratory and eye problems. Workers must wear appropriate protective gear. Even after the spray foam has completely dried, the dust may contain hazardous chemicals. For this reason, it is recommended that you consider using an alternative type of insulation.

Another risk associated with spray insulation is the presence of a fishy odor. This is caused by improper installation of the product. The odor can make a home uninhabitable. To minimize this risk, be sure to handle the material with care and respect. If you are not sure whether or not your insulation is safe to use, talk to a professional.

Another potential concern with spray insulation is the exposure to boric acid, which is a pesticide and flame retardant. This substance is especially problematic during installation, when workers may be exposed to a high concentration of boric acid. Further, research is needed to determine the extent to which boron-based flame retardants may migrate into the air.

According to the Environmental Protection Agency (EPA), some spray polyurethane foam (SPF) insulation poses a risk to the health of workers. The chemicals contained in SPF insulation can cause eye irritation, respiratory irritation, and asthma. It can also result in chemical sensitization in some people.

While spray foam insulation provides a wide range of benefits, the chemicals present in it can be hazardous to the health of the people who work with it. For this reason, workers must wear protective clothing and avoid skin contact with the chemicals. Furthermore, residents should leave the home for at least 24 hours following its application.